|
|
|||||||||||||||||||||||||||||||||||||||||||||
|
HOW TO's & PRODUCT REVIEWS |
|||||||||||||||||||||||||||||||||||||||||||||
|
|
||||||||||||||||||||||||||||||||||||||||||||
|
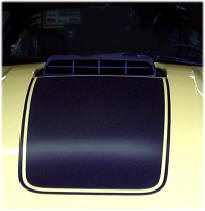
TIP #1 - HOW TO Raise your SHAKER... |
|||||||||||||||||||||||||||||||||||||||||||||
 |
By Registry Founder - Dave Wagner (DO this mod at your own risk, Mach1Registry is not responsible for any damage from the result of this modification.) |
||||||||||||||||||||||||||||||||||||||||||||
|
(Click on images |
1. Cover your Driver's Side Fender with your Mach 1 Fender Cover (What?
You don't have one? - Order on the Products page... Click Here) -Or- any other towel or cloth cover will have to do. SAFETY FIRST! Make sure the Engine is Shut off, parking brake on and the car is in park or a gear. |
||||||||||||||||||||||||||||||||||||||||||||
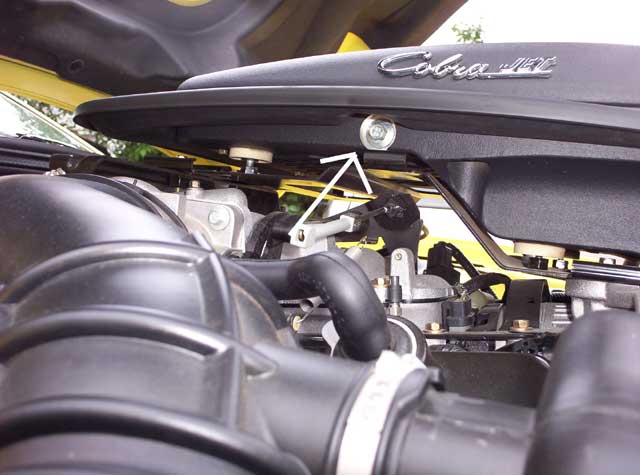 Fig. 1  Fig. 2 |
This procedure is Quite simple with a couple of normal wrenches (10 &
15mm). 2. Remove the (2) Shaker HOLD DOWN Bolts from both sides of the Shaker. They are down under each side. (10mm) See Fig. 1 and 2 on Left. |
||||||||||||||||||||||||||||||||||||||||||||
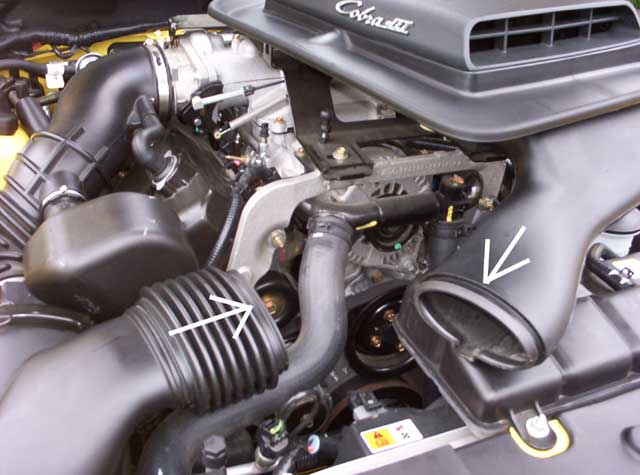 Fig. 3 |
3. Remove the Air Intake Tube from the air box as shown in Fig. 3. You can also remove it from the airbox itself, whichever is easier. |
||||||||||||||||||||||||||||||||||||||||||||
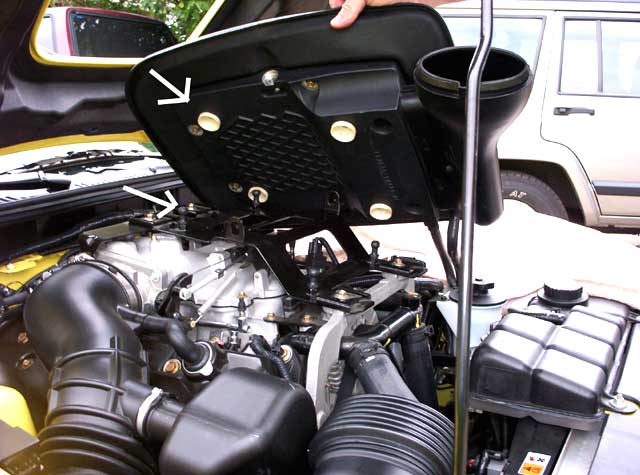 Fig. 4 |
4. Lift up gently on the shaker to disengage the ball joint type
connectors. Lay the shaker over on the driver's side fender out of your
way. This is where the rattle/squeak can happen. You can put a bit of silicone spray or grease on the ball joint sockets (white nylon pieces). |
||||||||||||||||||||||||||||||||||||||||||||
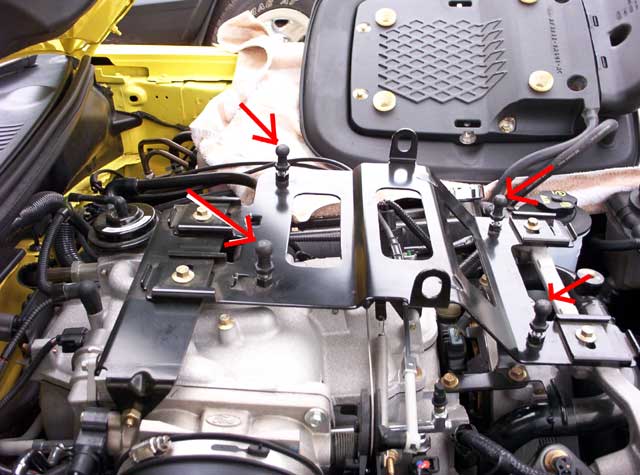 Fig. 5 |
5.
Locate the 4 ball joints that support the shaker.
|
||||||||||||||||||||||||||||||||||||||||||||
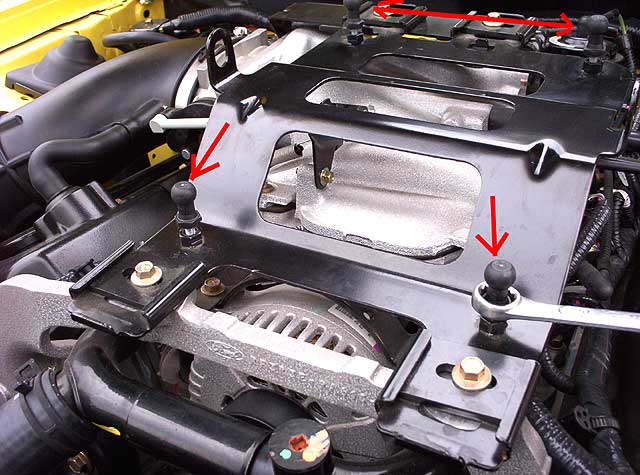 Fig. 6 |
6. Unscrew the threaded ball joint risers approx. 1/4" or
less!!*(5-10 turns). Make sure you count the number of turns, or measure
them. Make sure you leave enough threads engaged so they do not come loose thru vibration. *NOTE: DO NOT RAISE TOO MUCH, It will put too much pressure on your seal and hood and may cause the hook to crack.!!!
Depending on how tight they turn, you may not have to put any washers
under them. If they are loose, unscrew all the way, place 2-4 washers
under them and tighten. |
||||||||||||||||||||||||||||||||||||||||||||
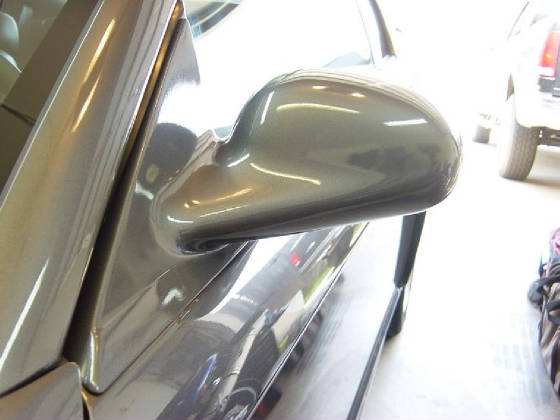
| Tip #2 - How to Paint your Mirrors '94-'03 | |||||||||||||||||||||||||||||||||||||||||||||
|
|
Check out this
Step By Step how to paint your mirrors. http://mysite.verizon.net/res0ypq1/id16.html |
||||||||||||||||||||||||||||||||||||||||||||
| TIP #3 - How to upgrade Spark Plugs with new Iridium Plugs | |||||||||||||||||||||||||||||||||||||||||||||
| Your Mach 1 should take the NGK #TR55IX | |||||||||||||||||||||||||||||||||||||||||||||
|
|
Why Use Iridium? Iridium is a precious metal that is 6 times harder and 8 times stronger than platinum, it has a 1,200(=F) higher melting point than platinum and conducts electricity better. This makes it possible to create the finest wire center electrode ever. Prior till now, platinum had been favored for long life or performance spark plugs due to its high melting point, also the technology did not exist to machine and bond iridium on a spark plug electrode(at least in a cost effective manner). Iridium industrial spark plugs have been around for years, but still sells for over a hundred dollars per plug. Just now is the technology available to effectively use iridium in a spark plug for automotive applications. The strength, hardness and high melting point of iridium allows NGK to manufacture there iridium ultra-fine wire center electrode to 0.7mm. One of the finest firing points in the industry! (Thus far there has been no problems reported regarding use of iridium plugs with nitrous oxide.) Founder Dave's Comments ( 03Mach1) - "Seemed to really Smooth the idle out, faster acceleration!!!" Total install time: 1.5 Hours |
||||||||||||||||||||||||||||||||||||||||||||
|
Tech Tip
Sponsored by: |
|||||||||||||||||||||||||||||||||||||||||||||
| TIP #4 - MRT Catted H-PIPE - Installation/Review | |||||||||||||||||||||||||||||||||||||||||||||
 |
Upgrade your Mustang's
exhaust system to MRT (Mustang Racing Technologies) new Stainless Steel H-pipe for the
1999 and up
Mustangs and MACH 1. The only one on the market! Improve performance and get that low
deep tone that H-pipes are known for! Direct Bolt on. Made of 304SS and
2-1/2" tubing. http://www.mustangracing.com Founder Dave's (03Mach1) Comments... "This definitely gives your Mach that 70's Muscle Car tone. Keeping the Stock Mufflers, it sounds a bit deeper and only a bit louder, not raspy at all, just add the MRT Cat Back exhaust (Coming Soon!) and REALLY wake it up." Total time: 2 hours |
||||||||||||||||||||||||||||||||||||||||||||
| TIP #5 - How to Remove your Air Intake Silencer | |||||||||||||||||||||||||||||||||||||||||||||
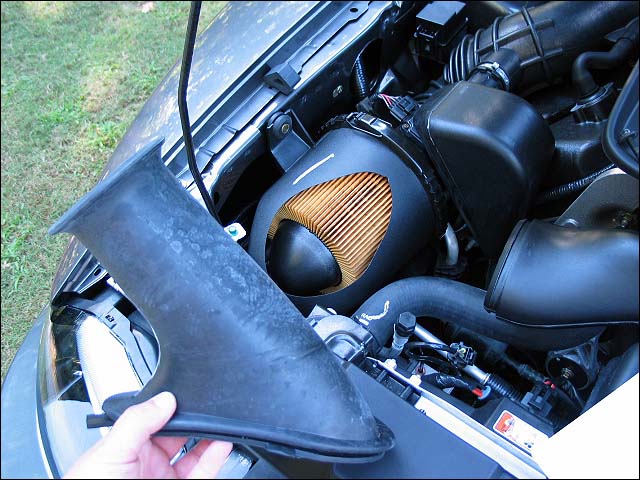 |
Here is a step by step on how
to remove the air intake silencer from the inner fender.
http://xfoa.net/tech%20articles/masr.html
|
||||||||||||||||||||||||||||||||||||||||||||
| TIP #6 - Dri-Wash Detail Cleaner | |||||||||||||||||||||||||||||||||||||||||||||
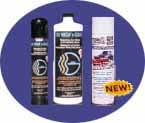 |
DRI WASH 'n GUARD®
cleans, seals,
polishes and protects cars, trucks, boats, recreational vehicles,
airplanes - virtually any non-porous surface - without using water. Thanks
to exclusive formula Poly-Guard-3®, you just spray DRI WASH 'n GUARD®
directly on the dirty surface, wipe to a haze and buff off with a clean
terry cloth! Mach 1 Registry Comments..." This stuff really works great!, goes on smooth, cleans and shines very easily, no rubbing, buffing..." www.Dri-Wash.com |
||||||||||||||||||||||||||||||||||||||||||||
| TIP #7 - Diagnostic Mode on Instrument Cluster | |||||||||||||||||||||||||||||||||||||||||||||
 |
Free Digital speedo, Tach, Engine temp, oil pressure and Metric speedo ?
Thanks to our friends over at MustangWorld.com http://www.mustangworld.com/ourpics/fcar/dtcodes.htm |
||||||||||||||||||||||||||||||||||||||||||||